
Table of Contents
Secure remote access is essential for managing cloud infrastructure — especially in fast-moving environments. At 2ops, we help our clients implement scalable, secure access to Azure resources without overcomplicating the process.
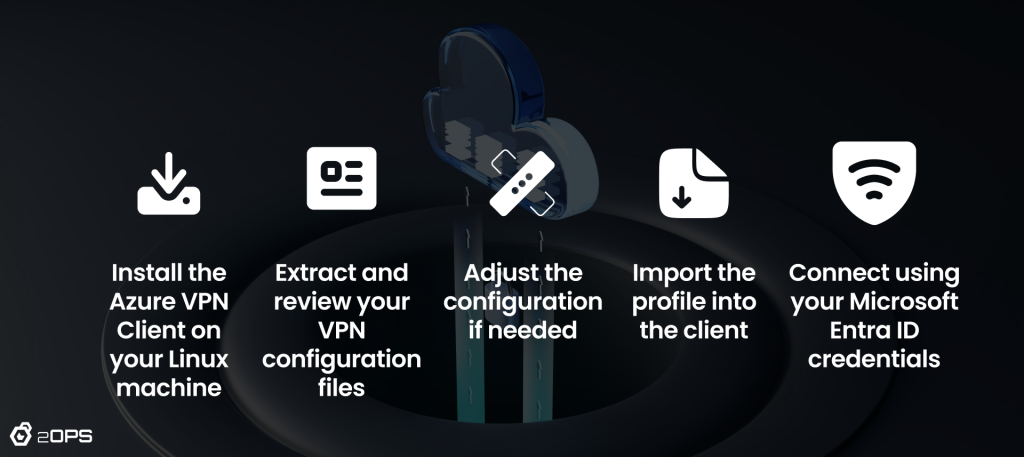
In this guide, you’ll learn how to configure the Azure VPN Client on Linux (Ubuntu) to connect to your Azure virtual network using point-to-site (P2S) VPN and Microsoft Entra ID for authentication.
Prerequisites
Before we dive in, make sure you have these pieces in place:
- You’re running Ubuntu 20.04 or 22.04. Other distributions might work, but only these two are officially supported.
- Your Azure environment has a VPN Gateway set up for point-to-site (P2S) access.
- Microsoft Entra ID authentication is enabled on your VPN Gateway.
- You’ve already downloaded the VPN client profile package from your Azure portal. This will include the necessary .xml config file.
Need help configuring your gateway first? Check out Microsoft’s P2S VPN gateway setup guide.
Workflow
Step-by-step Setup
1. Install the Azure VPN Client for Linux
Start by installing the official Azure VPN Client from Microsoft’s repository.
					# install curl utility
sudo apt-get install curl

# Install Microsoft's public key
curl -sSl https://packages.microsoft.com/keys/microsoft.asc | sudo tee /etc/apt/trusted.gpg.d/microsoft.asc

# Install the production repo list for focal
# For Ubuntu 20.04
curl https://packages.microsoft.com/config/ubuntu/20.04/prod.list | sudo tee /etc/apt/sources.list.d/microsoft-
ubuntu-focal-prod.list

# Install the production repo list for jammy
# For Ubuntu 22.04
curl https://packages.microsoft.com/config/ubuntu/22.04/prod.list | sudo tee /etc/apt/sources.list.d/microsoft-
ubuntu-jammy-prod.list

sudo apt-get update
sudo apt-get install microsoft-azurevpnclient
2. Extract the VPN Profile
Unzip the client configuration package you downloaded from the Azure portal.
Inside, you’ll find a folder called AzureVPN. Open it up and locate either:
- azurevpnconfig_aad.xml, or
- azurevpnconfig.xml
This XML file includes the connection settings you’ll import into the VPN client.
Note: If you don’t see the XML file, double-check your gateway settings to make sure they’re configured for Microsoft Entra ID and OpenVPN.
3. (Optional) Modify the Profile for Custom Audience IDs
If your VPN Gateway uses a custom audience (not the default Microsoft app ID), you may get repeated sign-in prompts.
To fix this, open the XML config file in a text editor and add your custom audience and app ID. Here’s a template:
					<aad>
   <audience>{customAudienceID}</audience>
   <issuer>https://sts.windows.net/{tenant ID}/</issuer>
   <tenant>https://login.microsoftonline.com/{tenant ID}/</tenant>
   <applicationid>c632b3df-fb67-4d84-bdcf-b95ad541b5c8</applicationid>
</aad>
Save the changes.
4. Import the Configuration Profile
- Open the Azure VPN Client on your Linux machine
- Click Import in the lower-left corner
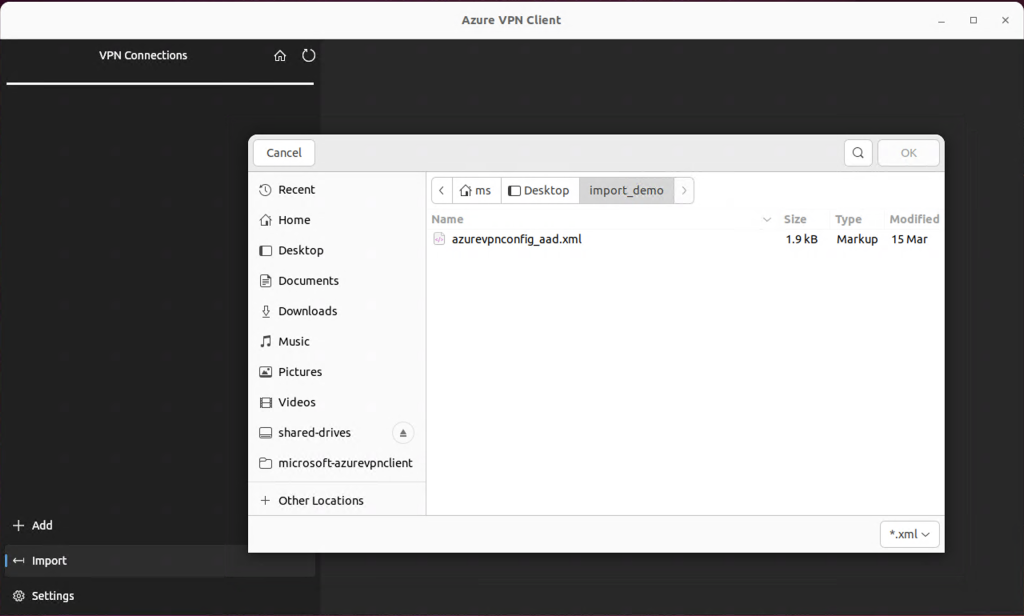
- Select your .xml profile file and confirm
Now fill in the required fields:
- Certificate: Choose DigiCert_Global_Root_G2.pem (or DigiCert_Global_Root_CA.pem)
- Authentication Type: Set to Microsoft Entra ID
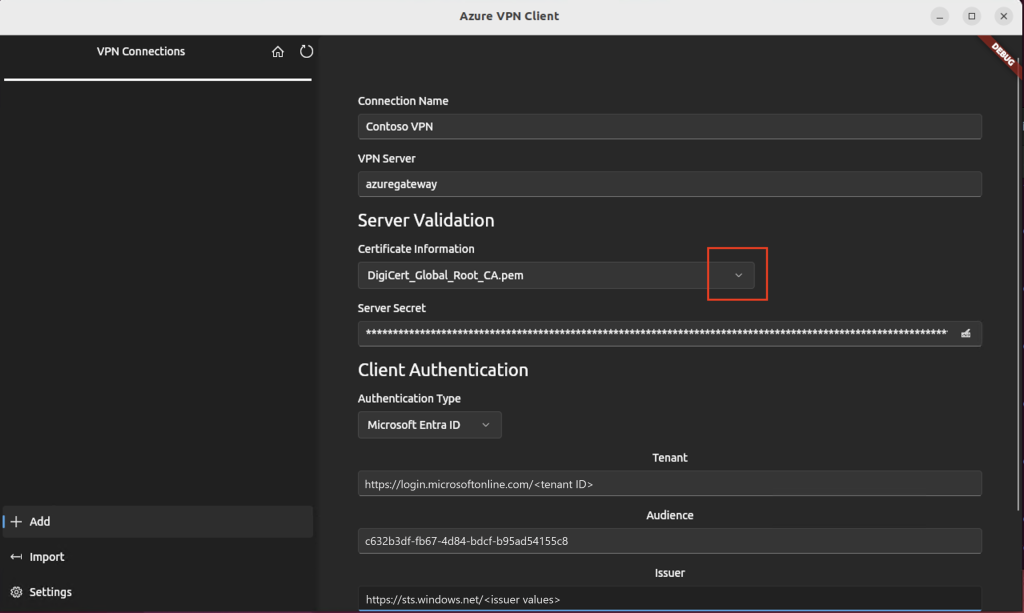
- Tenant: https://login.microsoftonline.com/<your-tenant-id> (no trailing backslash)
- Audience: Use your Application ID (Microsoft’s default is c632b3df-fb67-4d84-bdcf-b95ad541b5c8, or your custom one)
- Issuer: https://sts.windows.net/<issuer values>/ (include the trailing slash)
Click Save when done.
5. Connect to the VPN
- Select your new profile in the VPN Connections pane
- Click Connect
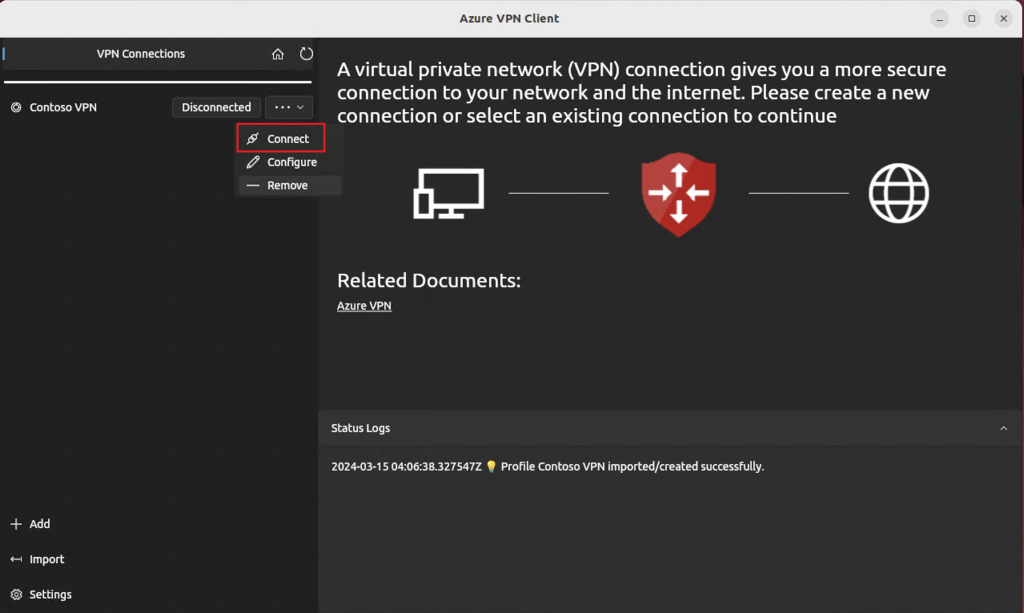
- A browser window will open for Microsoft Entra ID sign-in
Once connected, the client will show a green icon and status will read Connected.
To disconnect, just select the profile and choose Disconnect.
Optional Tweaks
Remove a VPN Profile
To delete a saved profile:
- Select it in the client
- Choose Remove from the dropdown
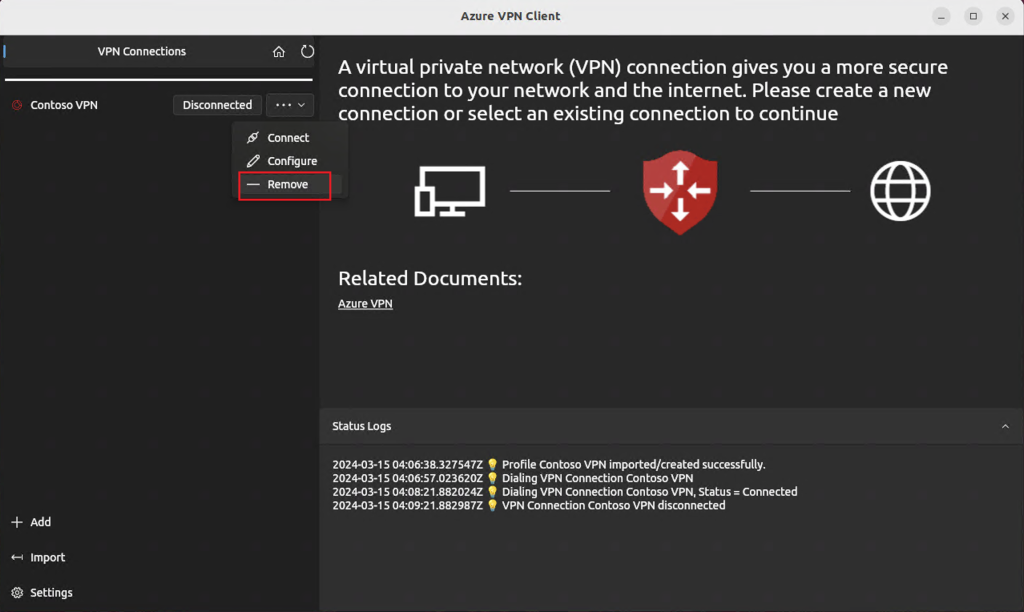
- Confirm when prompted
You’re Connected — What’s Next?
Once you’re connected, you can securely access Azure resources like private APIs, databases, and other internal tools. If your team uses multiple environments (like Dev, QA, and Prod), keep in mind that you’ll need a separate VPN profile for each one — and can only stay connected to one at a time.
If you’re running into issues or want to integrate VPN access with broader infrastructure automation or security policies, 2ops can help.